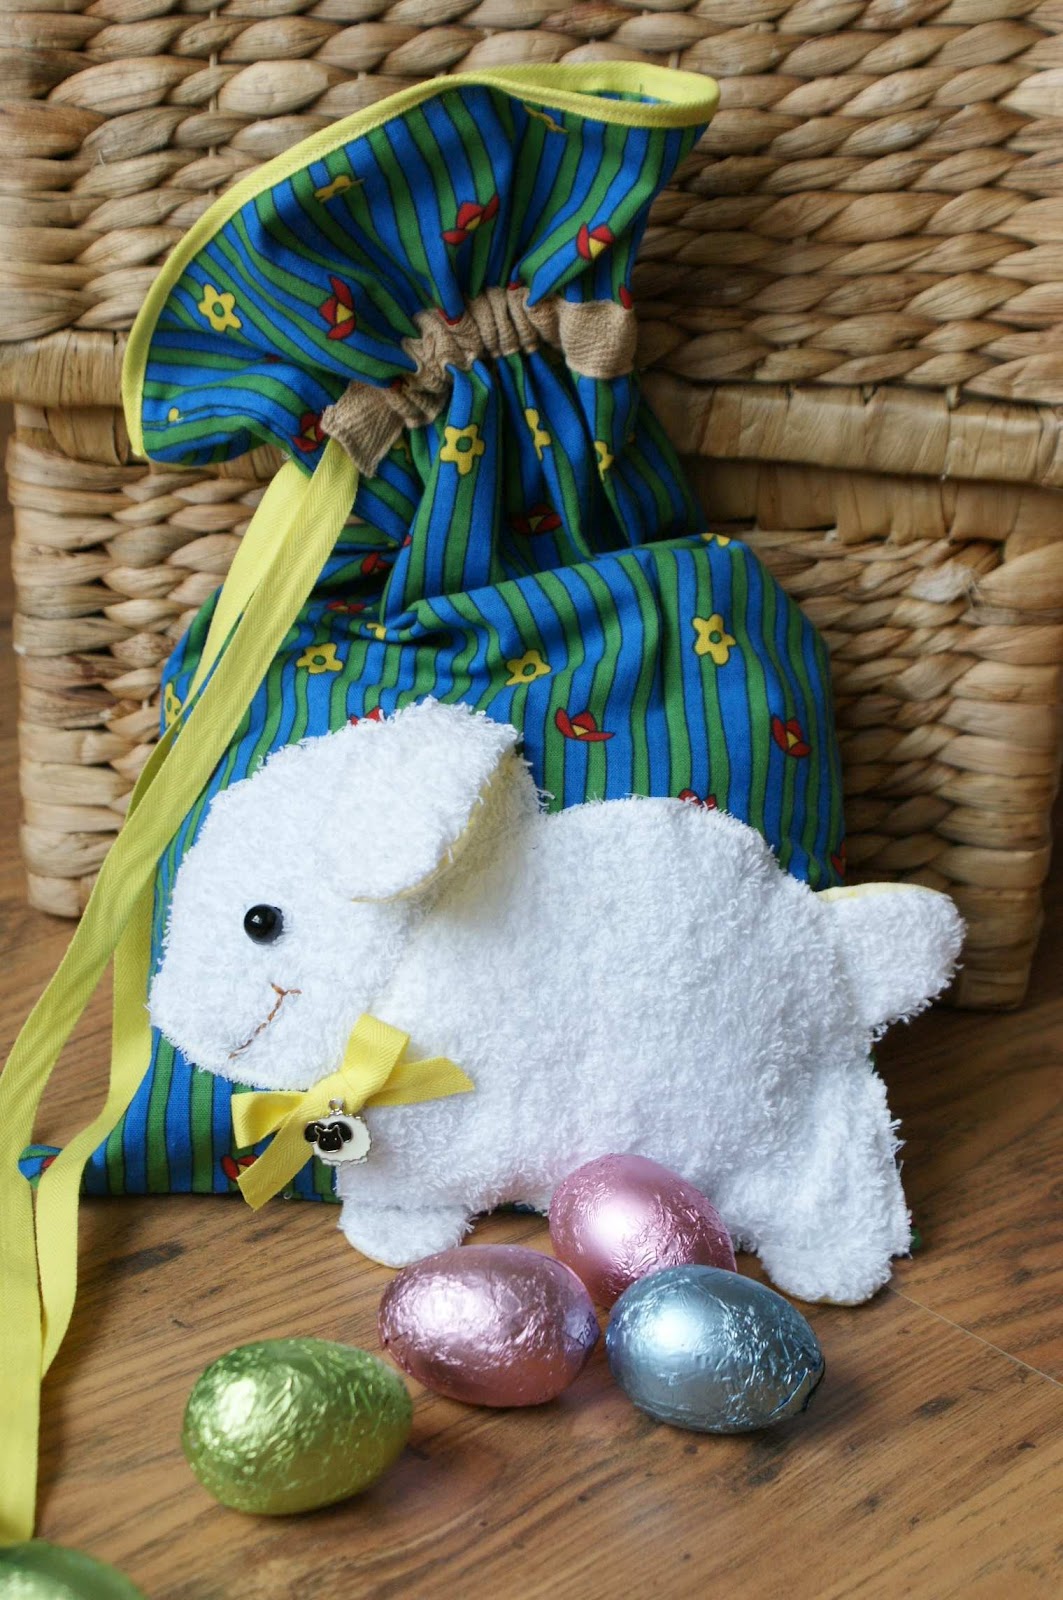
Easter is nearly here again. Last year I made an Easter bag (posted on my blog in April 2012). Originally it was intended for the Easter day egg hunt but we did not hide it in the cupboard after the Easter. It has been sitting on our kitchen shelve ever since, being used as a sweets' bag.
You can find the instructions bellow as published last year. Further bellow you can find some materials that could be used to sew this bag and that you can purchase directly from my online shop.
This year I wanted to make something new. I made an Easter basket from a card paper. It's very easy project and can be completed in a very short time. Keep checking my blog to see this project as well as some cute and colourful Easter cards that I will post on my blog in the coming days/weeks.
If you have already some sewing experience, you will find this sewing project very quick and easy.
You
do not need a lot of materials for this Easter bag and you can use any
scrap material leftovers you have. The more colourful the bag the
better. After all, it is an Easter time and a spring and it is nice to
see a bit of colour after the grayness of the winter time.
I used following materials:
- 2 pieces of 40 x 25 cm blue/green stripe
- small pieces of pale yellow material (as a backing for ear, legs and tail)
- 2 x white facecloth (30 x 30cm each) - You can use any old towel
- apprx 50 cm of beige rufflette webbing (width 2cm)
- apprx 160cm of yellow rufflette webbing (width 1.5cm) - for the string and a decorative top edge of the bag
- apprx 20 cm of yellow rufflette webbing (to make the bow)
- charm or little bell to attach to a bow
- and a black bead or a button
- I also used a bit of white material as a backing for the body and
head but you do not need to use the backing if the colour of your bag is
light
Let's make the Easter bag.
Cut 2 pieces of size 40 x 25 cm for the bag. The next step is to sew the sheep on to one of the 40 x 25cm main pieces.
Here is a template for the sheep:
Cut
2 x legs, 1 x tale and 1 x ear from the yellow material (this will be
the inside backing to create a colour contrast). When cutting, add a bit
extra for the edge allowance for legs, tail and ear.
Then
cut the body and the head from a white material - that material will be
between the white towel cloth and the main piece bag material and you
will not see it on the end product, but I had to ad this backing as the
bag material is too dark and I wanted to ensure that the sheep's body
will be pure white and the colour of the bag does not show through the
white towel material. When cutting the body and the head, cut exactly as
outlined on the template without adding any extra allowance as there is
no need for an edge allowance. See picture bellow.
Secure all the cut pieces (legs, tail, ear, head and the body) on to the white towel cloth using pins and cut around.
 |
| Side A |
 |
| Side B |
Make sure that the materials for legs, ear and tail
are the right side together. Sew these alongside the template outline
(leave the bottom of these 4 pieces unstitched) and then turn inside
out.
Take the head cut out piece and secure it with
pins to the main bag piece (the white backing material is inside -
between the towel cloth and the main bag material). Insert the ear
underneath the head so that the head is overlapping the edge of the ear.
Then sew around the edge of the head piece.
Take
the body cut out piece and secure it with pins to the main bag piece so
that it slightly overlaps the head already sewn to the bag (the white
backing material is again inside - between the towel cloth and the main
bag material). Insert the tail underneath the body so that the body is
overlapping the edge of the tail. Then sew around the edge of the body.
To
attach the legs secure them to the body using pins as seen on the
picture bellow. To ensure that you do not sew through the tail when
sewing the sides of the bag together, turn the tail onto the body and
secure it with the pin to keep it out of the way.
Then
take the other main piece (40 x 25 cm) and secure it with the pins to
the other piece with the sheep sewn on. Ensure that the right sides are
together and sew (right side, bottom of the bag - thus sewing through
the legs and the bottom edge of the body, and then the left side of the
bag) taking 1 cm allowance. Turn the bag through.
Sew
the beige rufflette piece onto the bag as close to both of its edges as
possible, leaving an opening for the string on one side. Then pull the
yellow rufflette string (apprx 100 cm ) through. Then take the remaining
piece of the yellow rufflette and sew it onto the top edge of the bag.
See picture bellow.
And now those finishing touches.
 |
| Sew a smile on. |
 |
| Sew a black
bead (or a button) on as an eye. Tie a bow from the yellow rufflette and
sew it onto the sheep. You can ad a small charm or a bell onto the bow. |
I have set
up and online shop - CRAFT MAGIC ONLINE SHOP- on my blog (top right
corner). You can now purchase many crafting supplies right here. The
shop is powered by Amazon, so you would be making the purchase through
Amazon. I have just selected (and sorted into various categories)
crafting products that Amazon sells. My blog's shop is divided into 3
parts; paper and scrapbooking supplies, crafty kids (offering variety of beautiful crafty kits and
products designed for children) and sewing and patchwork supplies.
SUGGESTED CRAFT SUPPLIES SUITABLE FOR THIS PROJECT:
You
can purchase following items in my online shop. Click on the image for
more detail. The link will get you directly into my shop. Please note,
that the stock has been available at the time of this posting and might
be sold out in the future date.